
 By
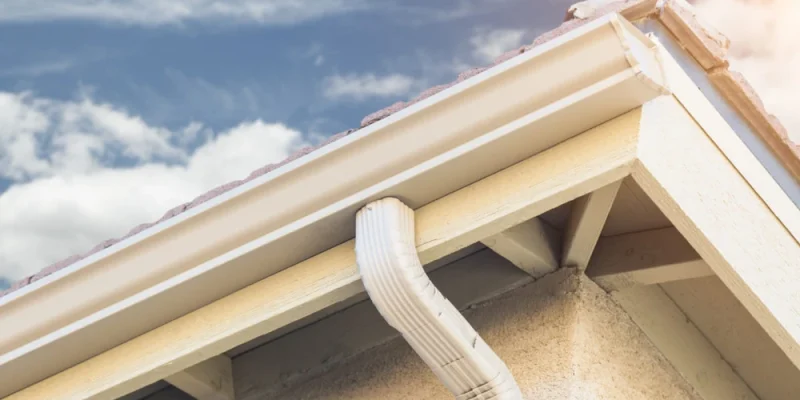
Installing gutters means creating a continuous route that collects roof runoff and directs it safely away from the building. The job involves more than attaching a trough to the fascia: measurements, slope, hanger spacing, outlet placement, downspout routing, and safe access all affect performance. A straightforward, low-level project may be manageable for an experienced DIYer, but multi-storey homes, steep roofs, damaged fascia, and complicated drainage often justify a professional installation.
A gutter system includes the gutter runs, hangers or brackets, end caps, corners, outlets, downspouts, and discharge extensions. Some systems use sectional lengths joined on site, while seamless systems are formed to length with specialist equipment. The correct layout and installation method depend on the selected product, roof geometry, local rainfall, and manufacturer instructions.
At a glance
| Topic | Key point |
| Layout | Measure runs and outlet locations |
| Slope | Follow the selected system instructions |
| Safety | Use stable access and avoid unsafe reaching |
| Testing | Check flow, leaks, and standing water |
Inspect the building before measuring
Start by examining the fascia, soffit, roof edge, and existing drainage route. Soft timber, peeling paint, rot, or loose trim should be addressed before new gutters are attached. A new gutter fastened to a weak surface can pull away under the weight of water, debris, or ice.
Look for roof valleys that concentrate runoff and areas where water currently splashes or stains siding. Note nearby trees, narrow side passages, patios, and landscaping that may affect access or downspout placement. This initial survey helps you plan a complete drainage route rather than simply copying the old layout.
Measure each gutter run
Measure each straight eave section separately and record its start and end points. Include changes in direction, roof levels, porch sections, and any areas that should not receive a gutter. Avoid assuming that opposite sides of a house are identical; extensions and roof geometry can create small but important differences.
Record the location of every outlet and downspout, plus the height available for the run to slope. The measurement should reflect the system’s actual layout, not just the building’s perimeter. Follow the manufacturer’s guidance on maximum run lengths and whether a long section needs more than one outlet.
Choose a compatible gutter system
Sectional systems are assembled from pre-cut lengths and fittings, making them accessible for many small repairs. Seamless systems reduce joints along straight runs but generally require specialist forming equipment. Profiles, sizes, colours, and fastening methods differ between products, so confirm compatibility before buying components.
Select the material for the climate and building. Aluminium is common, vinyl may suit some smaller projects, and steel or copper may be chosen for particular strength or appearance requirements. Confirm the specified fasteners and whether the system is suitable for the expected rainfall and roof area.
Plan the slope and outlet positions
Water must move toward the outlets rather than sit in low spots. The required slope varies by system, so use the manufacturer’s stated guidance instead of relying on a universal rule. A long run may be sloped toward one end or divided so that water drains to more than one outlet.
Mark the high and low points before fitting the gutter. Use a level, chalk line, or other suitable layout method to maintain the intended fall. If the fascia is uneven, do not simply follow its edge; the gutter’s drainage path still needs to be correct.
Prepare tools and materials
Depending on the system, the job may require a tape measure, level, chalk line, ladder or scaffold, drill, approved screws, snips, sealant, brackets, outlets, end caps, and downspout fittings. Check the manufacturer’s instructions for recommended cutting methods and tools. Some materials need different blades or handling to avoid damaging their finish.
Lay out components in installation order and verify quantities before climbing. Keep small parts in a secure container and avoid carrying loose tools while on a ladder. Appropriate eye protection, gloves, stable footwear, and a safe access plan are essential; metal edges can be sharp even when the material looks light.
Work safely at height
Ladder work is a major risk in gutter installation. Place access equipment on firm, level ground, maintain the correct setup, and avoid reaching sideways to save moving the ladder. Do not work in strong wind, rain, or icy conditions. Keep the area below clear of people and pets.
A multi-storey property or a roofline with difficult access may require scaffolding, a lift, or a professional crew. Never lean over a roof edge or stand on an unstable surface to reach a bracket. If the task cannot be performed without unsafe stretching or uncertain footing, stop and change the access plan.
Install hangers and gutter sections
Follow the system’s specified hanger spacing and fastening method. Spacing may need to change near corners, outlets, or areas with heavier expected loads. Fasteners should enter sound material, and the gutter should remain aligned without twisting. Do not rely on old holes if they are stripped or the surrounding fascia is damaged.
Join sectional lengths using the correct connectors and sealants where required. Fit end caps and corners according to the product instructions. A neat appearance matters, but consistent alignment and secure attachment are more important. Avoid overtightening fasteners or deforming the gutter during assembly.
Fit outlets and downspouts
Place outlets where they can receive water efficiently and connect to a practical discharge route. Cut openings using the method recommended for the material, remove burrs, and fit the outlet securely. The downspout should be attached with suitable straps and fittings without restricting the flow path.
Direct water away from the foundation, paths, and areas where erosion could occur. Extensions or underground drains may be needed depending on the site. Do not connect to a buried drain unless its capacity and permitted use are known; blocked or undersized drainage can cause water to back up toward the building.
Check corners, roof edges, and valleys
Corners and roof transitions need careful attention because they concentrate joints and can receive a high volume of runoff. Use the intended corner pieces and sealant, if required, rather than improvising a patch. Verify that the gutter does not sit so high that water runs behind it, or so low that roof runoff overshoots the trough.
Where a roof valley discharges onto a lower roof or gutter, consider the speed and volume of water. A concentrated stream may need a diverter or a revised outlet arrangement. Any change should preserve the roof manufacturer’s drainage requirements and avoid trapping debris.
Test the completed system
After installation, use a controlled flow of water to check that it travels toward the outlets and exits through the downspouts. Watch for standing water, leaks at joints, loose hangers, and splashback. A visual test should include each run rather than only the easiest section.
If water pools, identify whether the cause is incorrect slope, a blocked outlet, a deformed gutter, or an obstruction farther down the drain. Repair the cause before calling the job complete. Recheck after the first substantial rainfall because real roof runoff can reveal issues that a small test misses.
Common DIY mistakes
Frequent errors include measuring only the perimeter, forgetting accessories, placing outlets without considering discharge, setting an inconsistent slope, and attaching hangers to damaged fascia. Another problem is installing gutters too far below the roof edge, allowing water to overshoot during heavy rain.
Avoid using excessive sealant to compensate for poor joints or alignment. Sealants have a limited role and can deteriorate with weather exposure. Correct fitting, compatible parts, secure fastening, and clear drainage provide a more durable result.
Maintenance after installation
Clean gutters at intervals suited to the trees and debris around the property. Inspect after severe weather and look for sagging, separated joints, corrosion, loose straps, and downspout blockages. Remove leaves and sediment before they become compacted and difficult to clear.
If the system repeatedly overflows despite being clean, reassess capacity, outlet size, roof runoff concentration, and slope. A properly installed gutter still needs periodic care. Keep a note of repairs and the component types used so replacements can match the existing system.
When to call a professional
Professional help is appropriate when the fascia is damaged, the roofline is high or steep, the drainage route is complex, or local rules require qualified work. A contractor can also help when the system needs custom seamless gutters or when overflow suggests a sizing issue.
If you are unsure whether the structure can support the new system or whether water should be routed to an underground drain, seek advice before proceeding. The cost of professional installation may be lower than the cost of a fall or water damage caused by a poorly planned system.
Frequently asked questions
How much slope does a gutter need? Follow the instructions for the selected system; requirements vary by product and layout.
Can gutters be installed without replacing fascia? Yes, if the fascia is sound and provides secure fixing. Damaged boards should be repaired first.
Do I need a downspout at every corner? Not necessarily. Outlet placement should be based on roof area, system capacity, run length, and drainage design.
How can I tell if installation worked? Water should move toward outlets without persistent pooling, leaking joints, or overflow under normal test conditions.
Practical checklist
- Inspect fascia and roof edges before ordering.
- Measure runs and plan downspout discharge.
- Follow the product‘s hanger and slope instructions.
- Use safe access equipment and protective gear.
- Test every run and correct leaks or standing water.
Respect the manufacturer’s instructions
Gutter products are not all assembled in the same way. Bracket spacing, joint preparation, expansion allowances, sealant type, and fastening details can differ by material and manufacturer. Read the instructions before cutting or drilling, and keep the packaging or product sheet available while the work is underway. A method that worked for a different system may not be suitable for the one you purchased.
If a component is missing or damaged, pause and obtain the correct replacement instead of improvising with an unrelated fitting. Small shortcuts at outlets and corners can create leaks that are difficult to see from the ground. Correct components and consistent installation details are usually more dependable than an improvised repair.










Comments