
Professional popcorn ceiling removal services cost $1 to $3 per square foot on average, meaning a 1,500 sq ft home runs $1,500 to $4,500 for the full job. DIY removal costs a fraction of that—mostly just supplies and time—but comes with a real caveat: if your home was built before 1980, asbestos testing is not optional. It’s essential.
Whether you’re hiring out or rolling up your sleeves, here’s everything you need to know to make the right call and get the job done properly.
Why Are People Removing Popcorn Ceilings?
Popcorn texture (also called acoustic or stipple ceiling) was everywhere from the 1950s through the 1980s. Today, homeowners are removing it for several reasons:
|
Reason |
Why It Matters |
|
Outdated Look |
Smooth ceilings look cleaner and more modern – significant impact on how a room feels |
|
Asbestos Risk |
Pre-1980 popcorn ceilings often contain asbestos – a health hazard if disturbed |
|
Resale Value |
Smooth ceilings consistently attract buyers; popcorn texture is often flagged in home inspections |
|
Difficult to Clean |
Texture traps dust and cobwebs and can’t be wiped – a practical headache over time |
|
Lighting Problems |
Textured ceilings create harsh shadows with recessed lighting; smooth ceilings diffuse light cleanly |
DIY vs. Professional Removal: An Honest Comparison
|
Factor |
DIY |
Professional Service |
|
Cost (1,000 sq ft) |
$100 – $300 (supplies only) |
$1,000 – $3,000 |
|
Time |
Full weekend or more |
1-3 days |
|
Asbestos Handling |
Must hire certified pro regardless |
Certified removal included |
|
Quality of Finish |
Varies – skim coat skill needed |
Professional skim coat + sand |
|
Mess |
Very messy – prep is extensive |
Contained and cleaned up |
|
Best For |
Newer homes, handy homeowners, single rooms |
Whole-home projects, older homes, or anyone who wants a perfect finish |
The Removal Process, Step by Step
Whether you’re doing it yourself or watching a crew work, here’s what the process looks like:
- Step 1 – Test for asbestos: For any home built before 1980, collect a small ceiling sample (or hire someone to) and send it to a certified lab. Results in 24-72 hours. Cost: $25-$75 per sample.
- Step 2 – Prep the room completely: Remove all furniture, cover floors with plastic sheeting, remove light fixtures, protect outlets with tape. This step is non-negotiable – the mess is substantial.
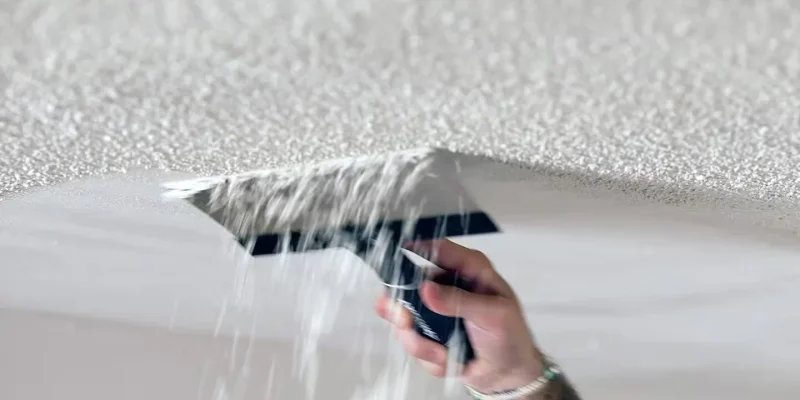
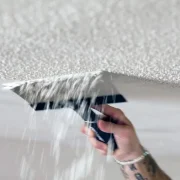
- Step 3 – Wet the ceiling surface: Using a garden sprayer, mist the ceiling with water (or a water + dish soap mix). Let it soak for 15 minutes. This softens the texture and dramatically reduces dust.
- Step 4 – Scrape: Using a wide drywall knife (6-10 inches), scrape the texture off in sections. Work methodically. Don’t press too hard – gouging the drywall underneath creates more work later.
- Step 5 – Skim coat and sand: The ceiling won’t look perfect after scraping – it rarely does. A thin skim coat of joint compound, allowed to dry and then sanded smooth, creates the clean look you’re after. This step is what separates a professional finish from a DIY result.
- Step 6 – Prime and paint: Two coats of ceiling paint, ideally with a primer sealer first to prevent flashing (uneven sheen).
The Asbestos Reality: What You Need to Know
Asbestos in popcorn ceilings is not a scare story – it’s a documented fact. The EPA estimates that asbestos was used in popcorn ceiling texture products until around 1977, and some materials were still being installed into the early 1980s.
Here’s the key thing: intact asbestos is not immediately dangerous. The risk comes when it’s disturbed – which is exactly what happens during removal. If testing confirms asbestos is present:
- Do not attempt DIY removal under any circumstances.
- Hire an EPA-certified asbestos abatement contractor specifically for this job.
- Abatement costs significantly more: typically $3 to $7 per square foot, and sometimes more.
- Consider encapsulation as an alternative – painting over the ceiling with special sealant rather than removing it. Cheaper and safer when asbestos is present.
What Happens After the Texture Comes Off?
Removal is only half the story. Here’s what your ceiling options look like once the popcorn is gone:
|
Finish Option |
Description |
Added Cost |
|
Smooth / Skim Coat |
The most popular choice – flat and modern, requires skill to execute well |
$0.50-$1.50/sq ft |
|
Light Orange Peel |
Very subtle texture, hides minor imperfections while still looking contemporary |
$0.30-$0.80/sq ft |
|
Skip Trowel |
Artisan texture applied by hand – hides drywall imperfections well |
$0.50-$1.20/sq ft |
|
Painted Bare Drywall |
Only works if drywall is in perfect condition – reveals every flaw |
Minimal |
How to Find and Hire a Reliable Service
Not every painter or handyman is qualified to remove popcorn ceilings – especially in older homes. Here’s what to look for:
- Verify asbestos certification: Any contractor working in a pre-1980 home should be certified in asbestos handling. Ask for their license number and verify it.
- Ask if skim coat and paint are included: Some quotes cover only the scraping. Get clarity on what the final ceiling will look like after their work is complete.
- Look for before-and-after photos: Ceiling finishing is a skill – make sure they can show you smooth, professional results, not just scraped ceilings.
- Get a written scope and price: Ceiling area in square feet, all included services, and a clear price. No per-hour estimates for this type of work.
Removing a popcorn ceiling is one of those home improvements that delivers an immediate, visible impact – rooms feel bigger, cleaner, and more modern the moment it’s done. Do the asbestos test first, choose your contractor carefully, and plan for the skim coat. The extra effort upfront is what makes the end result something you’ll be genuinely glad you did.


Comments